Sunday, June 23, 2013

Wearing an Anatomical Heart on a Recycled Sleeve

A recycled cuff loaded down with false memories

A tattered take on the phrase, "wearing your heart on your sleeve." Here is another piece in an ongoing series of cuff accessories created from upcycled thrift store mens' shirts (see Repurposed Shirt #6, and Extreme Dodo for more examples of embellished cuffs). I will point out yet again that the nifty thing about using the cuffs (aside from getting to use the rest of the shirt for another project) is that if you trim the cuffs closely along the edge where they used to be sewn to the sleeve, absolutely no finishing is necessary regarding the cuff base.

The base: trimmed cuff from a man's basic button-down shirt

From there, you may embellish the cuff any way you like. In this case, embellishmets included an iron-on anatomical image of a heart, some vintage scraps of hand-crafted Sri Lankan lace, a paper flower (this cuff will never be washed), a tarnished swim-meet medal from the flea market, and a few bits of broken jewelry.

The result is a cuff full of false memories telling a tale of wonder and woe, with a little competitive swimming thrown in.

Click to enlarge


For women, a man's cuff sleeve will probably be too large for your wrist. For a simple fix I used an X-Acto knife to slit one end of the existing buttonhole so that it is large enough to fit a carved jade button. I'd recommend just leaving the original button in place since it will be hidden when the cuff is closed anyway.

Enlarged button hole and vintage carved button


Sunday, June 16, 2013

Father's Day: Reverse Storytelling Installations


I know I'm not alone in finding idle wanders through old cemeteries an evocative delight. Over here is a man who emigrated from Scotland and traveled to San Francisco during the Gold Rush. Over there is a couple who lost three young children, all under the age of four. 

This Father's Day I decided to do a cemetery wander and create little mystery tableaus to provoke the imagination of fellow cemetery wanderers and commemorate the graves of men who may or may not have been fathers.

The first step: collecting odds and ends from around my studio. When I stopped for lunch on the way to the cemetery and opened my handbag, I realized what I had created was a crazy lady's pocketbook.

Crazy lady's pocketbook

And here are the graves, located in diverse settings at the Piedmont Cemetery in Oakland.

For Thomas Turnbull who died in 1887 at age 39: a teacup.

For George Ayer, who died in 1873 at age 60: an armless figurine of a girl.


For Christopher Appleton, who died in 1860 at age 72: a child's shoe.

For Isaac Wallace, who died in 1872 at age 53: a teddy bear leg.


For Marius Widemann, who died in 1877 at age 43: a toy soldier.

And finally, though he didn't live long enough to become a father or even reach puberty, there is little George Fox, to whom I gave a toy car because I thought it was the sort of thing a nine-year-old ghost would enjoy.

For George Fox, who died in 1879 at age 9: a toy truck

Here's hoping the dead enjoy the gifts, and the cemetery wanderers come up with some fanciful explanations for the objects on the graves.

Sunday, June 9, 2013

Extreme Dodo

The dodo cuff

Another accessory for members of iDodo (the International Society of Dodos): the dodo cuff. This lovely enhancement for any wrist combines a number of strategies shown on this blog in the past.

We begin with a simple cuff, recycled from a thrift store man's shirt. The nifty thing about these cuffs is that you can trim closely along the sleeve edge with a sharp pair of scissors and you've got your basic cuff base, which can then be embellished. There is no need to finish the edge, it won't unravel. For earlier experiments with cuff embellishments see Repurposed Shirt #7, and Repurposed Shirt #6.

Trim cuff closely at edge where it meets sleeve.

This cuff uses fabric charms (shown in previous post, the International Society of Dodos), along with boro mending (see Extreme Mending: Uber Boro, and more Boro Examples).

The finished cuff. Click to see larger version.

The buttonhole on the cuff was enlarged to accommodate a bigger button by extending the opening with an Exacto knife and then doing a little rough buttonhole stitching.

Enlarged and stitched buttonhole.

A carved transluscent stone button was added. No need to bother removing the original button - it will be concealed when the cuff is closed. This is how a lazy and extremely practical woman sews.

New carved stone button added.

In the picture below, the fabric dodo charms are lifted back to reveal the underlying boro stitching. In this case, scraps of fabric (with edges unfinished for a pleasingly rough look) were sewn onto the original cuff using Japanese sashiko stitching. Again, you may read more about boro by going to Extreme Mending.

Underlying boro mending work revealed.

Photos of the finished cuff are shown below. If you want to attempt your own version of a dodo cuff, you'll find a link to a free downloadable template of dodo images for use in making dodo fabric charms at the International Society of Dodos.

Back of cuff

Side view

Monday, June 3, 2013

The International Society of Dodos (iDodo)

This post celebrates the newly formed International Society of Dodos (iDodo). Our motto: If you're human, you're already a member.


The poor Dodo, an earth-bound bird about the size of a Thanksgiving turkey, toddled around Mauritius until visiting sailors bashed its brains out for sport, rendering the species extinct. With fitting irony, the International Society of Dodos bears witness to the fact that we humans belong to the only species that is single-handedly rendering itself extinct. Through guns, war, man's general inhumanity to man, and overall destruction of habitat, we are on our way out as a direct result of our own doing.

Wear an iDodo accessory to let others know that while you may be a member of a species that is self destructing, at least you're acutely aware of what is going on. A free PDF download, the Dodo Take-Away Sheet, described further at the end of this post, makes creating your own iDodo gear dead easy (if you'll pardon the pun).

Dodo Pendant
A simple statement, made using an iron-on photo transfer image to create a stuffed fabric charm with sewn-in cord loop.

 
Back of pendant, utilizing scrap of recycled material

Dodo Patch
The Dodo Patch again uses an iron-on transfer, applied to a scrap of recycled material. Ideal for use with a recycled man's shirt with unsightly corporate logos. Simply cover the logo with a patch (see Geek Chic: QR Code Patches for a similar strategy and how-to).

Dodo fabric patch

Patch close-up

Dodo Necklace
The Dodo Necklace uses the same type of strategy employed for the pendant (iron-on transfer, stuffed charms, sewn-in cord loops), but the emphasis here is on senseless gun violence.

Front: fabric transfers ironed onto scraps of recycled cloth

Back: scraps from recycled bathrobe

Dodo Pins
Finally we have the Dodo Pins, fashioned from recycled tin can lids and featuring a range of copyright-free vintage dodo images, all included in your Dodo Take-Away Sheet (see below). For complete how-to info on how to make pins from tin can lids, see the Tin Can Frames Tutorial and simply glue a pin backing onto your tin can frame.

Dodo head: last original depiction of a dodo, by Cornelis Saftleven, 1638

Segment of sketch by Sir Thomas Hubert, 1634

Facsimile of print by Roelandt Savery, 1626, in Royal Gallery at Berlin

Do-It-Yourself iDodo Gear:
 

Here is a JPEG view of the Dodo Take-Away Sheet. Download your own copy for free at my Google Groups site and you're on your way to creating your own iDodo gear.

Saturday, May 25, 2013

The Magic Swami Goldfish Tank

How do you turn a basically boring goldfish into a fascinating spectacle to behold? Through the magic of fish tank decor — extreme fish tank decor! At the end of this post you'll find a link to a free PDF template so you can tinker with your own fish tank or fish bowl.


Here are the basics on how the fortune-telling process works:


Here is the magic fortune-teller fish tank I created for my fish Lazlo.

Click on image to see larger version.

Use bits and pieces around the house to embellish your tank and create your curtain. My materials (I have very cool stuff around my house) include broken bits of an antique Chinese lantern, jade Buddha-head beads, gold tassels, fabric, green glass beads, and trim.

The procedure: Ask a question with the curtain closed. Open the curtain, and your fish's position in the tank is the key to reading your fortune or receiving mystic answers to your questions.


Here is the tank with the curtain opened:

Lazlo's mystic answer is "Yes."

A one-minute video (complete with haunting soundtrack) explains the back-story behind this invention:


Click on link below to view video

To download a template for the magic fortune telling panel, get a free 2-page PDF by clicking here: Magic Swami Goldfish Tank Templates.

The templates also include a much simpler, modified fortune-telling system suitable for fish bowls. The fish bowl system involves three medallions that may be fixed to the outside of the bowl using mounting wax or a dab of water-soluble glue.

Two-sided medallions for magic fish bowl

Fortune-telling fish bowl

The downloadable templates also include little gilded frames announcing "Intermission" and "The End" as well as a blank frame on which you may write the name of your magic goldfish. As always, have fun. Otherwise why bother?

Monday, May 13, 2013

The Pocket Garden: Where Geek Meets Eco-Chic


The very geeky, eco-chic pocket garden

Here is the latest false product from Stuff You Can't Have, and since this will never hit the market we're going to teach you how to make one for yourself. The classic geek accessory, the pocket protector, has been married to the idea of a miniature, portable garden. How green (or geeky) can you get?

The dimensions below are for a standard pocket garden and will fit into the pocket of your average man-tailored shirt. If you want to wear your pocket garden with a specific shirt or a shirt with different-size pockets, adjust the dimensions accordingly. The only supplies needed are vinyl, needle and thread, potting soil, and plant seeds.

Click on image to enlarge

In this first example of a pocket garden, we've used chalkboard vinyl left over from a previous project (Experiments with Chalkboard Vinyl), and we've planted an assortment of herbs.

Fill with potting soil, plant seeds, and water.

As the seeds are growing and when your pocket garden is not in active use, water as needed and prop it upright near a sunny window.

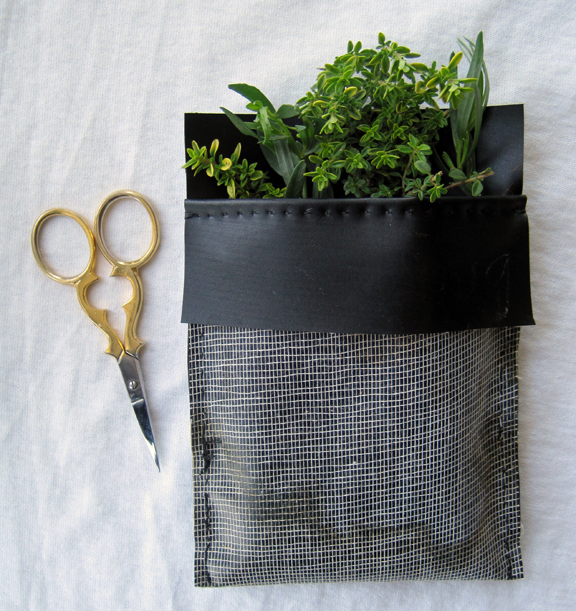
Pocket herb garden. You may want to add a loop on the outer flap for a small pair of scissors so that you may snip fresh herbs to enhance your meal while dining out.

The pocket garden in action. Because chalkboard vinyl was used it is possible to write messages on the front flap.

Below is a second example of a pocket garden with a slightly different design. This time around we've planted morning glory seeds.

Slightly different design

Sprouting morning glories

Morning glory pocket garden in action

Related Posts with Thumbnails