Monday, October 15, 2012

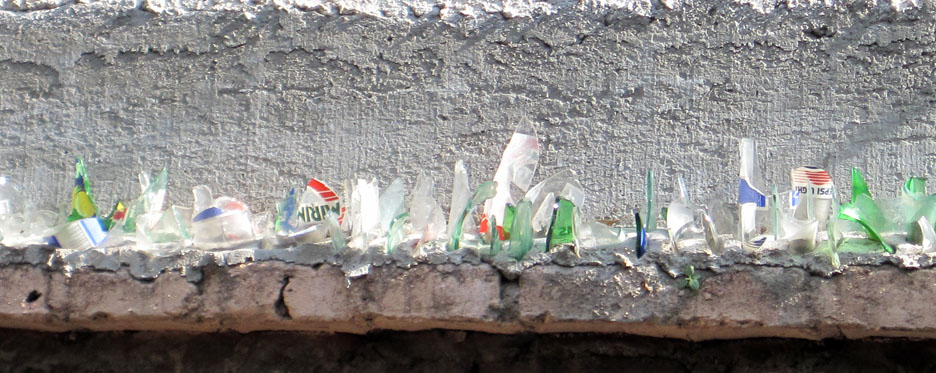
Found: Glass Landscapes

I usually find this glass-on-top-of-walls business ugly, upsetting and/or depressing, but for some reason this time around I was struck by how beautiful it is. All of these were discovered in various alleyways in San Miguel de Allende.


And a final glass landscape with a mixed message: "Peace and love to all mankind, but if you try to get into my house I will cut you to ribbons. . . love, Mary."


Friday, October 5, 2012

Creating Embroidered Ex-votos

Many are familiar with Mexican retablos - folk-art images painted on tin or wood thanking god, the virgin, or one of many saints for a miracle related to surviving a health crisis, accident, natural hazard, animal attack, or other misfortune. During a recent visit to San Miguel de Allende I encountered the regional custom of embroidering rather than painting these ex-votos (offerings of gratitude), which are called milagros. While I normally think of milagros as small tin depictions of body parts, people, and possessions that the devout buy and pin to the garments of statues of holy figures in the church, in this case the term is being used to refer to these embroidered pieces.

Two examples of these ex-votos, on display in the house where I was staying, are shown below.

Thanks to the virgin (senorita) for assistance in an encounter with a coyote

Thanks to the Virgin of Guadalupe for watching over the sewer's mother

Itchy fingers and an urge to create my own ex-voto led to a trip to a fabric store for supplies (always an adventure in Mexico involving a somewhat baffling, multi-step  purchasing process). As for the miracle, no problem; one was delivered right to the tranquil little plaza of San Antonio where we enjoyed hanging out in the evening. One night a throng of people were on the steps of the church of San Antonio, surrounding a couple who were dishing up ice cream. A little kid I'd made friends with came up, cone in hand, and told us we should go and get some ice cream for free. I asked why it was free and he said it was a gift from the virgin (or for the virgin?). We got our two, free, absolutely delicious lime ice cream cones. Later investigation led to the finding that the ice cream incident coincided with citywide celebrations to commemorate the day of Our Lady of Loreto, one of the patron deities of San Miguel de Allende.

Images of the Our Lady of Loreto appear throughout San Miguel de Allende. She is intriguing because she has no arms, though there is some dispute about just why she has no arms. More about her and how and why San Miguel celebrates her can be found in the local paper, Atencion.

Statue of Lady of Loreto over doorway

Lady of Loreto above Institute de Allende

Note how, because she has no arms, Jesus sort of sticks out of her side or rides on her shoulder. In my embroidered ex-voto, I thanked the Virgin of Loreto for her gift of lime ice cream.

Offering of thanks to the Lady of Loreto

Thanks to the Virgin of Loreto (without arms) for the lime ice cream.

Go back to the photos of the statues above and note how Our Lady of Loreto resembles an upside-down ice cream cone.

Lady of Loreto (shown upside down to reveal startling resemblance to ice cream cone)

I found the stone patterns in some of the walls in San Miguel de Allende intriguing and replicated that pattern in the Lady's ice cream cone garment.

Wall of the Institute de Allende

Replicating the stone pattern in the ice cream cone

Because the Lady of Loreto has no arms, I decided to embroider some floating alongside her. They look like the little tin charms most of us think of when we hear the word "milagro."


 And finally, a little detail from the ex-voto:


Inspired? Go out and make an ex-voto of your own.

Wednesday, October 3, 2012

Contrary Toddler Couture

Here's a solution for using up leftover sewing notions, getting rid of yet another used t-shirt, and ending up with a very artsy and vaguely Parisian outfit for your favorite toddler. Step one involves scoring a cheap romper pattern for a couple of dollars. Then start cutting up a t-shirt, mixing in some random fabric scraps, and tossing unrelated notions onto the garment.

Romper displayed on child's wicker rocker

This romper starts with a t-shirt from the Corcoran Gallery in Washington, D.C. as the base. Shoulder straps are scraps from an upcycled man's shirt. Four buttons from a vintage button collection allow the straps to be adjustable. Notions include silk roses and scraps of lace, contributing to the "ooh la la" look.

Adding buttons makes the straps adjustable

Oooh la la!
 

Wednesday, August 29, 2012

How to Photograph a Fairy


Lichen fairy

The series of images displayed here represent the first successful attempt to photograph fairies since the 1917 photos of the Cottingley fairies, taken by two young cousins in the English countryside. After intensive investigation, the Cottingley photos were pronounced genuine at the time by Sir Arthur Conan Doyle and representatives from the Eastman Kodak Company. However, the young girls who took the photos, Frances Griffiths and Elsie Wright, later admitted that all but one were fraudulent. Until their deaths they argued over which of them had taken the one genuine photo.

Running fairy

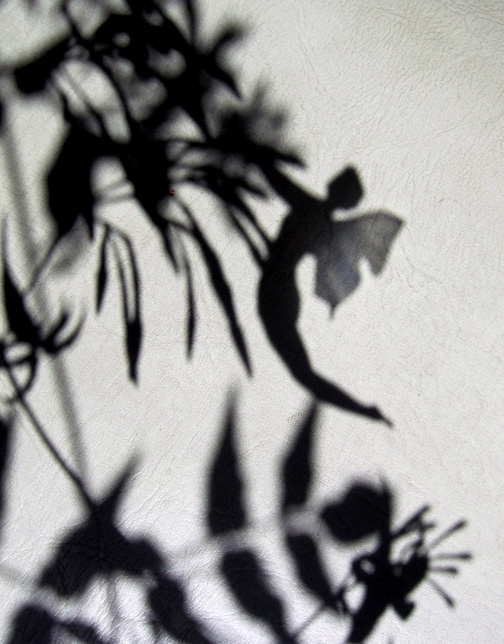
The technique shared here is based on extensive field research leading to a key finding (and it is one that puts the Cottingley cousins' claim to that one genuine photo in doubt): the only way to trap a fairy's image is to photograph its shadow.

Fairy alighting on flower tips (movement has slightly blurred the image)

All photos shown here are absolutely genuine and have not been Photoshopped or retouched in any way. Click on any image to see an enlarged version and inspect the photo more closely. To attempt to duplicate the method used, you will need shards of cardboard, a camera, and a fairly secluded location with lush foliage and a fair amount of flowers. You will also need a considerable amount of patience.

Fiddling with the pistil of a flower (harvesting?)

Second fairy involved in the harvesting operation
The method:
• Just before dawn or sunset, when the light will be at a near-horizontal slant, set rectangles of cardboard upright around and among the plants at various locations. Trial and error over time will lead to identification of the best potential spots.
• Aim your camera at one of the cardboard rectangles and establish focus by focusing on the shadows of plants and flowers cast on the cardboard. Wait patiently for shadow images of the fairies to flit into view.
• Prepare to snap a photo at the slightest movement. 

Preening fairy. I am almost certain this fairy was aware of my presence and what I was doing.

Preening fairy once again, seemingly almost posing. I believe this is a younger fairy.

Never attempt to focus a camera directly on a fairy. Cameras, particularly digital cameras, may be irreversibly damaged if you attempt to do so. At the very least, as I've learned to my regret, you will contaminate the atmosphere, creating an area known as a "spoiled fairy spot." In such an event it is highly unlikely any sprites will return to your garden—ever.

Dancing fairy—acting a little looney

Male fairy doing something to some weeds

An unusual sight: two mail fairies playing

As I continue experiments with this technique, I would be most interested in hearing reports of others' experiences attempting to duplicate the method outlined here. Again, patience is an absolute must and success may not take place for months or even years. However, one could spend time in worse ways than lying in wait for fairies.


Thursday, August 23, 2012

Photo Filter Window Treatment

Here is a quickie window treatment idea using tulle and photo filter swatchbooks for situations in which you'd like the light to pour in, but the view outside is nothing special. I got these swatchbooks of photo filters for free from someone who worked in a television station, but you can score your own for just a few bucks. Each swatchbook includes a wide array of colored polyester filters.

GamColor standard swatchbook - 4.5 x 1.5 ($4.50)

Musson - they say to call or stop by their showroom for a free swatchbook

I decided on a color palette and then mixed and matched filters from the two swatchbooks. To preserve the hole in each filter sheet, I sawed through the plastic bolts that holds the swatchbooks together. A single stitch through the hole secures each filter to the tulle curtain.

The new colored filter window treatment
The windowsill and interior edges of the window have been painted a pearlescent blue in accord with the new color palette.


Sunday, August 19, 2012

The Great Lavender Harvest of 2012

In the fall I travel to the high plains of Colorado for the chautauqua and while there reap the bounty of the lavender harvest. The two lavender-related projects below were a multisensory, uber-aromatic hit.

Drying the lavender

In all cases, whether making simple sachets or tackling fairy cakes, preparations begin with harvesting and drying the lavender. If you're using the lavender for baking, make sure it has not been sprayed with any chemicals. Once the lavender is dry, remove the flowers from the twiggy branches. Save the twigs and strew them along walkways and garden paths. Passers-by will get a pleasant aromatic surprise with each footstep.

Lavender Bath Bombs
Toss a lavender bath bomb into the tub and luxuriate in lavender-scented steam, taking advantage of the herb's soothing effect on the nerves and salubrious effect on the skin.

Lavender bath infusion (click on image to enlarge and read label)

The materials used couldn't be simpler: coffee filters and dental floss.

Materials needed

Put a couple of hefty pinches of lavender in the middle of a coffee filter, tie off the bundle with dental floss, and fluff out the edges of the coffee filter so that it looks like a large white flower. If you like, print out a sheet of labels and cut them out free-hand as shown below. Loop the narrow tab around the neck of your bath bomb and secure with a dab of glue.

Cut labels out free-hand

Bombs away
Lavender Fairy Cakes
Who doesn't think of fairies in relation to lavender? While fairy cakes are popular in England and Australia, they're relatively unknown in the United States. The recipe below represents a happy accident that occurred when converting grams to cups and making a few mistakes along the way. The result is an entirely original and wonderfully light, spongy little fairy cake.

Lavender fairy cakes

Step One: Lavender Sugar
This is a nice little project in its own right and while you'll need this sugar to make the fairy cakes, jars of lavender sugar could make a nifty gift accompanied by the fairy cake recipe.
• 1 cup caster sugar (a much finer grind than granulated; look for C&H Baking Sugar in a container that looks like a milk carton, found in most supermarkets in the baking section)
• 2 Tbs. dried lavender
Combine caster sugar and dried lavender in a food grinder, coffee mill, blender, whatever. Grind together until lavender is thoroughly mixed in. While some advise waiting a week to use the sugar until the lavender has thoroughly permeated the mix, I've found it works just fine immediately. Store sugar in cool dark place and it will keep for up to a year.

Step Two: Fairy Cakes
Makes about 36 tiny cupcakes
Preheat oven to 400 degrees Fahrenheit
Combine the following ingredients and mix with egg beater, or on very low setting in a mixer, for 2 to 3 minutes:
• 1/2 cup self-raising flour (make sure it's self-raising!)
• 1/2 cup softened unsalted butter
• 1/2 cup lavender sugar
• 2 eggs
Then add and mix a little more to create a smooth batter:
• 3 Tbs. milk
Use mini cupcake baking tins, and line tins with little paper cases. Fill the cases no more than 2/3 full with batter.
Bake for 10 to 11 minutes until top is springy to the touch. These stay light colored - they don't turn brown.
Remove from oven and let rest in tin for about five minutes, then turn out onto cooling rack to cool completely. Meanwhile, make the icing.

Step Three: Icing
The icing is thin and dribbly and may run off the top and down the sides.
• 1/2 cup icing sugar (powdered sugar)
• 1 Tbs. warm water (use a little more to make icing runny as needed)
Create violet food coloring by mixing a few drops of red and blue food coloring. Test color by flicking a drop into a glass of clear water and adjust as needed. Add coloring to icing a drop at a time until you have a pale lavender color.
Ice the fairy cakes. Garnish with a tiny sprig of fresh lavender.
Again, all lavender used should be free of chemical sprays.

Guaranteed to blow the mind of even the most discriminating fairy

Tuesday, August 14, 2012

In Case of Emergency, Gut the Bunny

Hiding, secrets, and all of the deliciously covert maneuvers of childhood are incorporated in this piece involving an altered, hitherto innocent, stuffed animal.

Materials: Stuffed animal for fifty cents scored at a garage sale; scraps of fabric from a second-hand Tommy Bahama shirt that literally fell into pieces as I was wearing it (too much salt air?); embroidery floss; recycled little Trader Joe's tea mints tin; fragment from a rapidly disintegrating toddler's security blanket.

The original bunny (already slit from stem to stern — I just couldn't wait)

Altered facial expression using embroidery floss. Why so sad? It's not easy keeping secrets.

Altered torso

Gutting the bunny involved removing about half of the interior stuffing. Using scraps of the Tommy Bahama shirt, I created a simple pocket, shoved it into the bunny's interior, and blanket stitched around the edges. Two flaps from the Tommy Bahama shirt front were then sewn onto either side of the torso opening. 

Tin containing rare remnant of toddler's security blanket

Tin inserted into secret belly slit


Bunny with a secret
Related Posts with Thumbnails