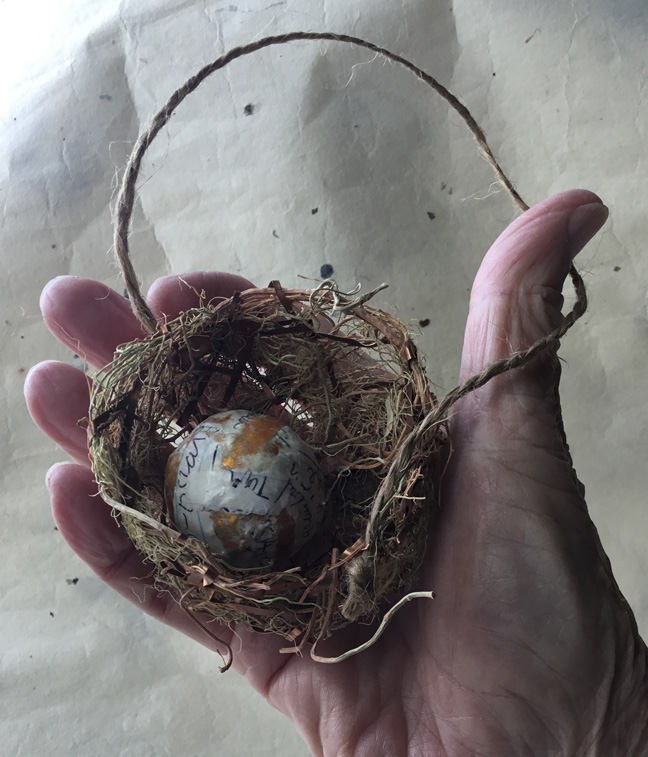
Monday, May 13, 2013

The Pocket Garden: Where Geek Meets Eco-Chic


The very geeky, eco-chic pocket garden

Here is the latest false product from Stuff You Can't Have, and since this will never hit the market we're going to teach you how to make one for yourself. The classic geek accessory, the pocket protector, has been married to the idea of a miniature, portable garden. How green (or geeky) can you get?

The dimensions below are for a standard pocket garden and will fit into the pocket of your average man-tailored shirt. If you want to wear your pocket garden with a specific shirt or a shirt with different-size pockets, adjust the dimensions accordingly. The only supplies needed are vinyl, needle and thread, potting soil, and plant seeds.

Click on image to enlarge

In this first example of a pocket garden, we've used chalkboard vinyl left over from a previous project (Experiments with Chalkboard Vinyl), and we've planted an assortment of herbs.

Fill with potting soil, plant seeds, and water.

As the seeds are growing and when your pocket garden is not in active use, water as needed and prop it upright near a sunny window.

Pocket herb garden. You may want to add a loop on the outer flap for a small pair of scissors so that you may snip fresh herbs to enhance your meal while dining out.

The pocket garden in action. Because chalkboard vinyl was used it is possible to write messages on the front flap.

Below is a second example of a pocket garden with a slightly different design. This time around we've planted morning glory seeds.

Slightly different design

Sprouting morning glories

Morning glory pocket garden in action

Sunday, May 5, 2013

Rice Cracker Pin


Senbei pin

Make a pin in less than five minutes. All you need is an artfully crafted food item with a history that dates back over a thousand years. This pin is made from a senbei, a traditional Japanese rice cracker, first introduced to the scene in 737 AD. This one incorporates peanuts that look like scattered leaves. When you hold the senbei up to the light at the right angle, you can see that it has a bas relief embossed pattern on front and back.

How long do senbei last and will this pin hold up over time? I made this pin at least fifteen years ago and it has been knocking around in an over-stuffed drawer where I recently rediscovered it. Who knows? With care it might last another thousand years. To make the pin, all that is required is a beautiful senbei, a few minutes with a pin backing and a little silicone glue and the result is a new piece of jewelry.

Pin backing glued on

The final picture shows you the scale. It makes a striking (and feather-light) brooch centered on a black silk knit T-shirt. I believe I found my senbei at a museum restaurant. I ate one and wasn't impressed with the flavor, but was alert enough to snag a second one for a jewelry project. You may find your own senbei during a visit to San Francisco's Japantown, online, or hop on a plane and go to the source.

Scale: a large but feather-light brooch


Monday, April 29, 2013

Embroidered Sound Waves (and Upcycled Shirt #13)


Sound wave of me singing out of tune: "...fish are jumpin' and the cotton is high."

The idea of embroidering sound waves has been on the back burner ever since I participated in a symposium on listening at the Exploratorium a number of years ago. This is the first experiment. To get a graphic of a sound wave I used Garage Band software, recorded myself singing, and then took a screen shot (Command, Shift, 4) of a section of the sound wave. This is going onto a vest fashioned for a hot climate, so I sang "Summertime" and selected the section, "fish are jumpin' and the cotton is high" because it had the most interesting graphic appearance.

Transferring sound wave image to cloth

Enlarge the sound wave image to the size you want and print it out. Use carbon paper to transfer the image to cloth. As you can see in the above illustration, the outside borders of the sound wave are what you want to focus on when transferring the image. You'll be stitching solid fill inside those borders, but there's no need to tediously fill it all in when doing the carbon transfer.

Embroidering the sound wave

Completed sound wave panel, sewn onto garment

Where did this sound wave panel end up? It serves as a back panel embellishment on an upcycled garment designed for the tropics. The original article of clothing was a light green linen jacket from a thrift store. It was altered as shown below into a tropical vest.

Click to enlarge

Finished vest

Back of vest with embroidered sound wave panel

Monday, April 22, 2013

Chalkboard Vinyl Haute Couture


Chalkboard vinyl handbag

In this final experiment with chalkboard vinyl (for now), we have a hand-stitched, high-fashion handbag.

When the blackboard is blank

When blank the bag looks utterly stylish with a nylon web strap secured to the sides with D-rings. A loop on the lower front contains a piece of chalk that may be slipped out of the loop and used to scrawl words or pictures on the bag when inspiration strikes.

Front loop with chalk

The bag's clasp, concealed under the front flap, is magnetic.


Begin the day with a blank bag looking fashionably discreet and then, with a chalked word or two, become as provocative or in-your-face as you want. Come to think of it, this is the perfect bag to bring to a protest march.


Note there are no how-to instructions in this post. If the concept inspires you, start playing with chalkboard vinyl and make a bag of your own.  For more about chalkboard vinyl in general and other chalkboard vinyl projects see the Chalkboard Vinyl Scribble Tote and Chalkboard Vinyl Pins.

Tuesday, April 16, 2013

Chalkboard Vinyl Pins


Pin made from tin can lid, pop-top tabs, medallion from an old medal, and little tool charms

The second in a series of experiments with chalkboard vinyl (see previous post or click here). This trio of pins was made using techniques outlined in the Tin Can Frames Tutorial on this blog. Here, instead of framing a picture, a piece of embroidery, or a bit of ephemera, I've framed chalkboard vinyl.

Three blank pins framing chalkboard vinyl

This means you can use chalk to write anything you want on the vinyl, changing the pin as the whim moves you.

The perfect message for international Pi Day. Pin made from broken rusted red clip, tin can, and broken jewelry.

The message below is in honor of a woman named Louise, who frequently opined that the world needs poor sports just as much as it needs good sports.

A "poor sport" badge to celebrate a noteworthy social moment. Pin made from tin can, pop-top tab, and old locket.

The pins can be used to convey your general attitude towards life on any given day.


You could also make a set of recycled, re-usable name tags. The possibilities are endless.

Thursday, April 11, 2013

Chalkboard Vinyl Scribble Tote Bag


Tote with chalkboard vinyl panels

Blackboard paint has been the rage for a while now, applied to walls, featured in frames, painted on globes, and embellishing furniture. It's fun but has to be "cured" before it functions effectively and has varying degrees of quality depending on how it was done.

Chalkboard vinyl turns out to be even more fun. No curing required - use regular old chalk to scribble whatever you want and then wipe off with a damp cloth (or a napkin and a bit of spit). Best of all, you can sew chalkboard vinyl, opening up a realm of possibilities. Here we have the Scribble Tote Bag, assembled from a spacious $4.99 canvas tote from Hobby Lobby that features two outer pockets, combined with a couple of panels of chalkboard vinyl. Google "chalkboard vinyl cloth" to find a source of supply. This is a fabric, not an adhesive backed vinyl. I purchased a half-yard of 47"-wide vinyl for $6.25 at Stone Mountain fabric store in Berkeley, which I've used for three different experiments that will be featured on this blog.

A simple addition to any canvas tote - chalkboard vinyl panels

After measuring the two front pockets of the tote I cut out two vinyl panels and hand-stitched them in place. My original vision for this piece was a shopping/errand bag with the chalkboard containing the grocery and to-do list.

Errand bag with grocery list and to-dos chalked in

Close-up of chalkboard panel showing hand stitching

A recent stint helping to wrangle a toddler and a three-year-old made me think this could also be a handy all-around-tote with a built-in distraction activity for the kids. When they start to fret just hand them pieces of chalk (which of course you keep in one of the outer pockets) and let them scribble away. One sweep of a damp cloth and they've got a clean slate and can keep on going.

Fun scribble tote

Stay tuned - at least two more experiments in chalkboard vinyl will be appearing shortly.

Monday, April 8, 2013

Embroidered Total Avian Life Support System


Northern Cardinal on organic whole grain bread

A new false product from Stuff You Can't Have, offering the birds in your back yard everything they need from cradle to egg. While earlier experiments with stitched bread were entirely frivolous (Embroidered Wonder Bread) or purely aesthetic (Boro Bread), the Avian Life Support System is marvelously utilitarian.

Red-winged Blackbird

Blackbird close-up

Each slice of hand-stitched bread depicts either a specific North American bird species, as with the Red-winged Blackbird above, or evocative nature environments, as with the California wildflowers below. The base is organic, whole grain, high-fiber bread and the embroidery floss is 100% cotton. Each slice incorporates a loop at the top for ease of hanging. Here is how the Total Avian Life Support System works:
  1. Hang your Total Avian Life Support System (TALSS) from the limb of a tree, well out of reach of predators.
  2. Over time, birds will come and peck at the bread, absorbing its nutritional value, until they eventually consume all edible components of the TALSS.
  3. What remains are colorful strands of embroidery thread hanging from the branch. Now the birds may swoop in, snatch the soft cotton strands in their beaks, carry them away, and use the strands to line their nests, nurturing the next generation.

California wildflowers TALSS

Trio of Western Bluebirds

Close-up of Western Bluebirds

Below is a time-lapse series showing the Total Avian Life Support System in action as the slice depicting the Northern Cardinal is displayed in a tree and slowly consumed.

TALSS installed in tree

TALSS slowly being consumed

TALSS in late stages of consumption

If you live in the San Francisco Bay Area, look for Total Avian Life Support Systems hanging in the trees around Lake Merritt. You may also inspect some of the TALSS examples pictured here more closely, on display under a bell jar at the Tinkering Studio at the Exploratorium after the grand opening in its new location on Pier 15 on April 17.


Related Posts with Thumbnails