Showing posts sorted by relevance for query mend writing. Sort by date Show all posts

Thursday, September 16, 2010

Mend Writing

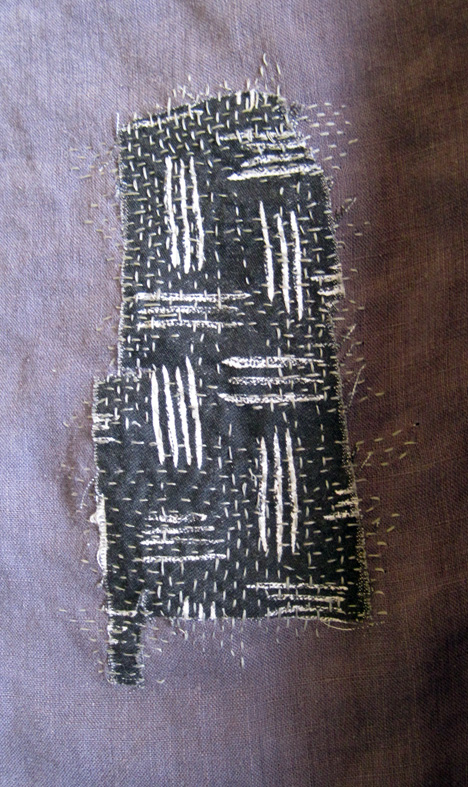
An artful technique for tacking down patches, covering stains, or decorating a repurposed used garment.


Mend writing tacking down a blue jean patch insert ("ripped")


Tacking down the other side of the insert ("soft wear")

This embroidery strategy lets you get a word in edgewise by using the English alphabet but arranging it so that it looks vaguely like some kind of Asian writing.


Mend writing concealing stains

After laboriously hand-stitching the top above, I found it discouraging that I managed to get food stains on the front in fairly short order. Here, mend writing right over the stains pretty much solves the problem.


"stained"

In mend writing, you incorporate some letters inside of other letters. Note the "t" inside the "s" above; the "i" inside the "a"; and the "e" inside the "n."


"salvaged"

Because almost no one else can read mend writing, you can be very sarcastic and/or blunt in your communication.


Repurposed altered and patched shirt with mend writing

Above, a used shirt has been altered by removing the collar, shortening the sleeves, adding a pocket (using the sleeve material), shortening the length, and adding side slits. Some mishap or other shortly after it was completed also necessitated a patch on the front.


"used clothing"


"patchwork"


"recycled"


The flip side


"wear it out"


"use it up"

Try deciphering the mend writing below on your own, and feel free to offer your translations in the comments section. Note - here I get a bit sarcastic about American consumerism.


A hint: the top horizontal bar appears to be missing from one of the "a" letters

Tuesday, March 25, 2014

Spider Stain Removal: The Little Miss Muffet Dress


The Miss Muffet Dress

Another score from the Oakland Museum White Elephant Sale: a diminutive little cotton lawn dress with a host of problems. The collar and sleeves were unfinished and fraying, the back closure had never been added, and the sleeve openings were too small for the almost-three-year old I wanted to give this to. Otherwise the garment was cunningly stitched, clearly homemade, with hand-sewn embroidery at the collar. Why did the creator abandon this project part way through? Closer inspection revealed the answer: stains on the upper left back. I've used many stain-obscuring techniques in the past from Mend Writing to Spirals. I have never, however, used spiders.

Spiders concealing stains

It turns out that once you start stitching spiders it's hard to stop.

Spider concealing nothing

more spiders...

and more spiders...

and more spiders...

Finally I had 12 spiders on what turned out to be a Little Miss Muffet Dress (poem follows). In the process I hemmed the collar and sleeves after creating a wider opening for the sleeves and added a back snap.

Miss Muffet front

Miss Muffet back

And a reminder of the words to the classic children's poem that is over 200 years old, dating back to 1804:

Little Miss Muffet
sat on a tuffet
eating her curds and whey.
Along came a spider
that sat down beside her
and frightened Miss Muffet away.

One can only imagine how this poem will be played out when the dress is worn by a three-year-old.

ta da
 

Friday, October 19, 2012

Extreme Mending (Uber Boro)


Extreme mending

The traditional Japanese approach to mending called "boro" (which literally translates to "rags" or "scraps of cloth") means mending for life, with garments repaired throughout the owner's lifetime and beyond. Peasant clothing fashioned from hemp and cotton, often in shades of indigo, was repeatedly patched and extensively repaired for generations. Multiple layers of fabric were sewn together with "sashiko" stitching - a simple stitch that runs in parallel lines and may also be cross-hatched.

Sashiko stitching on my travel vest

While I am an avid mender and have invented mending techniques of my own (see Mend Writing), I always assumed that at a certain point you simply have to give up, until I encountered the art of boro and started applying it to my travel vests. While boro is usually shades of indigo, my travel vests are usually shades of green and are made of linen. Hard wear around the world eventually results in rotting fabric which I gamely try to patch - and patch and patch and patch.

Old vest with multiple patches and extreme rot

Close-up: multiple patches on pocket, which continues to distintegrate

The vest above lasted for a decade or two. Patching techniques included the clever strategy of snipping material from the inside pocket (which was then replaced with another fabric) and using the snipped material for patches.

Inside of vest, showing where inside pocket panels were removed and replaced with other fabric. Fabric from the inside panels was then used as patching material

 I grew so attached to this vest that even after I thought it was no longer salvageable I couldn't bear to throw it out.

My current travel vest, also green linen, has also begun to rot at an alarming rate. This vest was created by converting a thrift store linen jacket, which involved cutting off the sleeves and the collar. Material from the sleeves was then used to create a V-shaped panel in the back, and to create an inside security pocket (absolutely essential in a travel vest). Leftover material from sleeves and collar became patching material as the vest began to go the way of all travel vests.

Travel vest from a converted linen jacket

Back of jacket with added V-shape panel and textile art

This vest includes a panel of textile art on the back by artist Paul Nosa, which was a gift from a friend. Unfortunately, my clever strategy of salvaging yet more patching material by cutting away fabric from underneath the textile art backfired when the fabric edges began to fray as seen above.

The use of boro has changed everything, including my tendency to want to hide the patching by using identical material. Boro has taught me that the patching itself is beautiful, particularly when highlighted by sashiko stitching, and different shades of fabric can enhance the end effect. My poor old wreck of a vest that I couldn't bear to throw away has now been cannibalized into patches for my current vest. 

Boro in progress

Shoulder

I am learning that boro is like gardening; it requires ongoing maintenance. I hold the vest up to the light and can see where the fabric is so thin that it is about to give way and I add another patch. There is joy in knowing I will never, ever have to give up this travel vest. I will maintain it through my lifetime and it will then go to whichever grandniece seems the most adventurous. By then it should be absolutely gorgeous.

Back, with sashiko stitching in progress


For more about the history of boro cloth in Japan and to see some lovely examples, visit Kimono Boy.

Sunday, February 21, 2016

Patching Three Ways to Cover Stains and Relieve Boredom


Boro patching with sashiko stitching

Surely I cannot be the only one who manages to drip a blob of something or other down the front of whatever I'm wearing, seemingly every single time I dine out. Unfortunately, those something-or-other blobs don't blend well with my love of natural fabrics and natural dyes. In my experience, once a blob hits cotton or linen it will remain there as an unsightly discolored stain no matter what cleaning methods I employ. Happily, I have learned to just patch those stains into oblivion in a variety of ways (see Mend Writing for one of those techniques not covered in this post).

NOTE: All three shirts in this post were thrift store scores in pristine condition before I waltzed them around in my messy world.

Stain removed with boro patch

I believe the culprit here was a bowl of mussels in anise broth. The blob smack in the middle of my chest remained a discolored stain after laundering.

Boro patch with sashimi stitching

To cover this unsightly stain I used a scrap of Japanese fabric and the Japanese technique of boro patching, employing sashiko stitching. I like the end result better than the original shirt, which was a bit boring.

Circle patching: a cure for boredom

Speaking of boredom, the patching job shown in the photo above is a response to an utterly boring Flax thrift store shirt. The solution: marrying it with another thrift store shirt. I cut up a $1 equally boring man's shirt, created a bunch of circle patches, and stitched them on.

Circle patch

To create circle patches, use a jar lid to draw a series of circles on a piece of cardboard and then cut the circles out. Place a cardboard circle in the center of a roughly circular piece of fabric, and then iron the edges over the cardboard template, being careful to keep your fingers out of harm's way. Slide the cardboard out and you've got a perfect turned circle ready for patching. I am keeping a few circles in reserve since it is only a matter of time before I manage to drop something down the front of this shirt.

Creating circle patches

From blob to political statement

Segueing back to unsightly blobs, here we have another thrift store Flax shirt. I have no recollection of what caused this particular stain, but post-laundering the problem was evident. This time around I used a leftover patch from my Sixth Extinction series. Follow that link if you want to see more Sixth Extinction couture and furniture and learn about our current eco-crisis and the 100th anniversary of the extinction of the passenger pigeon. 

Passenger pigeon patch and vintage buttons

This photo of dead passenger pigeon specimens in a museum collection was printed onto photo transfer paper, ironed onto a scrap of cotton fabric, and then used as a patch. Note that I have also switched out the shirt's original buttons with a set of vintage buttons. 


Related Posts with Thumbnails