Monday, July 17, 2023

Summer of Invention #1: Dead Dog Calcium Pill Reminder

 Welcome to the Summer of Invention, a creative interlude I have peremptorily declared, which kicked off about two weeks ago and is proceeding apace. The rules are simple: 1) Identify a problem, 2) invent a creative solution—the wackier the better. 

Below we have a prime example, focusing on the problem of remembering to take daily calcium pills. Every strategy I have tried in the past, including placing the pill bottle front and center on the table where I always sit, has utterly failed. I also have a deep aversion to tainting my aesthetic landscape with ugly plastic commercial products and labeling. The solution? Using inspiration drawn from the Days of the Dead celebrations which incorporate a playful use of bones, I came up with two strategies. 


Solution One


The first is a Days-of-the-Dead-style papier-mâché dog, which seems like the perfect reminder to take care of my bones while adding rather than detracting from my environment. We begin with a plastic bottle, destined to meet a fate far more exciting than the recycling bin.

Step 1: Pick a plastic bottle


Step 2: Rough shape the dog using paper towels and tape

Step 3: Start building layers of papier-mâché 

Voila! A pill bottle.

Note the bottle-cap butt feature

Solution Two

The second invention, far simpler to pull off, occurred to me while up to my elbows in flour paste working on solution one. This approach simply required recycling an old, smaller pill bottle. After measuring the bottle to figure out an accurate label size, I harvested a couple of images from the internet, resized them on my computer, printed them out, and glued them on. 

Original, ugly, bargain-size bottle

Front label on recycled, smaller bottle

Back label

Lid

And there you have it. Summer has just begun and more inventions are already in the pipeline. Stay tuned.

Saturday, June 17, 2023

Curiosity and Wonder: Gingko Butterfly Installation


How long ago did humans discover that, with a little artful manipulation, gingko leaves can be transformed into wondrous butterflies? The discovery could date back to the dawn of humankind. The gingko, a living fossil that hasn't changed for more than 200 million years, is a living link to the dinosaurs. 

In this ephemeral installation project on the eastern shore of Lake Merritt in downtown Oakland, I am using the illusion to entertain our species during what sometimes feels like the twilight of the apocalypse.

Butterflies in progress

I played with various mediums and discovered a few basic principles in creating gingko leaf butterflies:

• Always split the stem into antennae when fresh-picked (otherwise it will be too brittle to split)
• Acrylic paint is the only medium I tried that worked; pens and markers do not
• Create a base layer of color first and let it dry before adding the decorative details
• Metallic acrylics produced my favorite results
• I used little blobs of museum wax to affix to trees; scotch tape would be an alternative

Metallics


Mixed metallic and regular


The installation's focus is on attention to detail, beauty, curiosity and wonder. My hopes for viewer participation are as follows:

1. Notice: What is that? A butterfly?
 
2: Curiosity: Wait a minute, is it real?

3. Awe and wonder: It's a leaf! A gingko leaf on this beautiful gingko tree...

Below are a handful of photographs of the butterflies installed on the trunks of the gingko trees at the edge of the lake.


For those wondering whether I lurk around post-installation to see the results, the answer is no. Whether it is little people vacationing in a pothole, or a miniature luxury apartment for rent installed in a newsstand, the idea is to set it up and walk away. I have done my part, let the world carry on. During this install I got caught in a passers-by back-flow by surprise. By the time I had finished posting butterflies at the far end of the block, strollers were already noticing and stopping to inspect the first ones posted. A nice surprise since my curmudgeonly expectation is that most people walk around blind to their surroundings. 

Friday, June 2, 2023

Folding Time With Cake and Cigarettes


Anyone else fascinated by the idea proposed by physicists that time doesn't really exist? I certainly am, and spent time reading several dense but informative article explaining the idea from the quantum perspective. . . and then tossed those aside and launched into this ephemeral installation of public art.

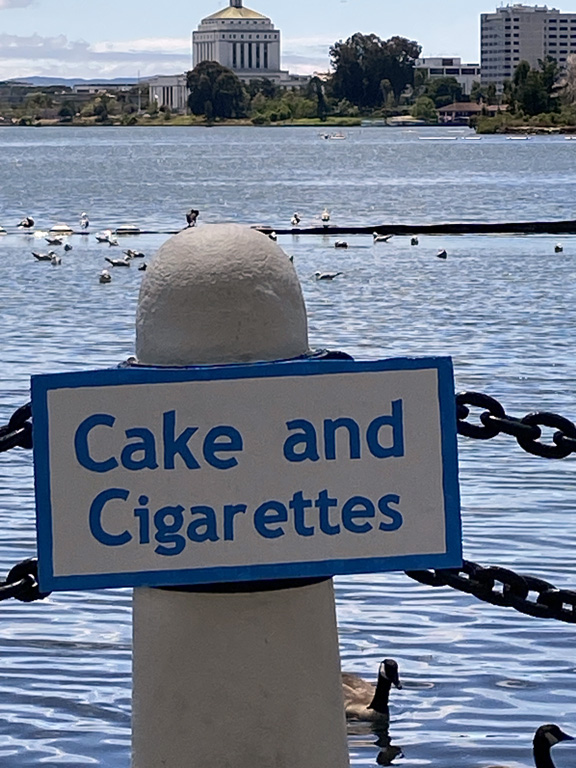
Forty or so years ago, I regularly rented a little house on the island of Ios in Greece (before the island had cars, electricity, or running water back in the valley where my house was situated). I kept returning over a period of 20 years, and my landlord was a fisherman so prototypically Greek that he appeared mending his nets on one of the most popular postcards in Greece at the time. I became friends with his family over the years and when Panayiotis asked if I could paint a sign for their cafe at one end of Milipotas beach I said, "Sure!" I asked what he wanted the sign to say and he said, "Cake and cigarettes," which struck me as a sort of quintessential, slightly evil form of word play or poetry. It delighted me. I made the sign and they hung it on the outdoor terrace to lure people in from the beach.

Signs in progress - 2023 time zone

After a trip to the paint store to get just the right shade of Mediterranean blue used everywhere on the islands in the Cyclades, I set out to fold time by recreating the sign and using it as a time travel/ transposition tool. Then I headed out to Lake Merritt in Oakland to amuse myself, engage the public, and outwit the physicists.

An Oakland native tries time traveling

Near the colonnade at the top of the lake, I was trying to figure out where to post the sign so I could then step back and take covert photos of the time warp process. I immediately encountered Darnell, who had settled into a folding chair to enjoy a cigarette. He thought the sign was funny, enjoyed the story behind it, and after posing obligingly for the photo above, became a co-director of the shoot, though he was worried that our biggest problem was going to be people coming up wanting to buy cake and cigarettes. I noted that what I really wanted was a shot of the sign with the drum circle that assembled at the colonnade every weekend, but was uneasy about intruding on that scene., Darnell announced, "Well, those drums belong to me, and I think the sign should be hung on that post right above the drummers."

He grabbed the sign and posted it exactly where he thought it should be.


A good time was had by all, and when the session concluded I reposted the sign just inside the colonnade for a series of people shots.

Click to enlarge

Click to enlarge

Why do all of this? What is the point? Every once in a while when I wake up in the morning the world seems like a dismal, boring, unfriendly place. That is the point at which I turn to public art installations. If nothing else, it makes the world more interesting to me. And I get to meet people like Darnell.


Saturday, March 11, 2023

Playing with Rust Printing

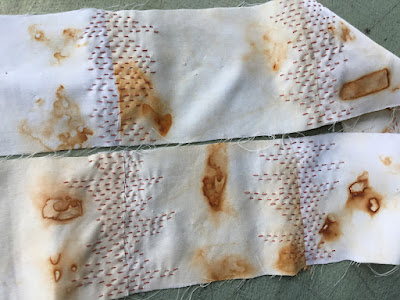
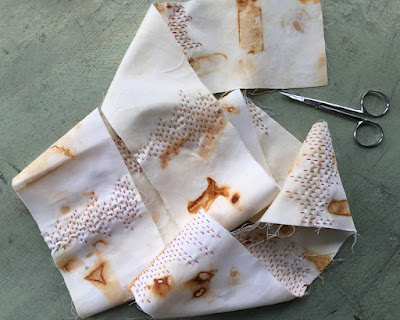
Rust-printed cloth and sashimi stitching

The hardest part of rust printing is building a stash of rust pieces. The rest of the process is pure experimentation and joy. In fact, collecting rust can be a joyous process in itself. My personal stash of rust has been assembled over the past forty years during walks through industrial districts and combing for junk while strolling along railroad tracks.  

The Process
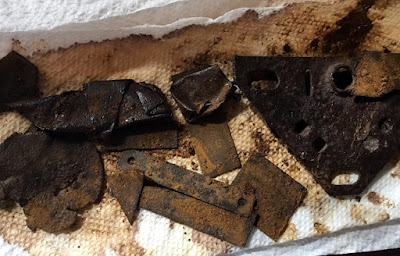
Rust pieces

There are a number of slight variations on the rust-printing process you can find through googling. After experimenting, I found the simplest to be best:

• Prepare a 50/50 mix of white vinegar and water in a spray bottle.

• Lay down a protective layer of plastic (I used cut-up recycled plastic bags), and reserve an equal amount of plastic to use as a top layer to keep the whole thing moist while the rusting magic goes on. Arrange a layer of cloth or paper. Spray all of this generously with your vinegar mix.
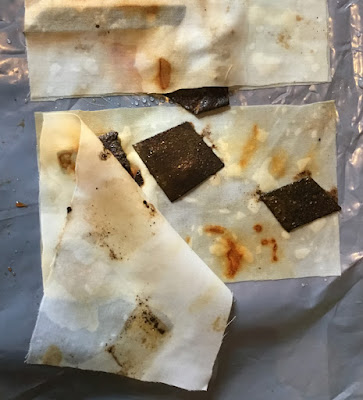
Rust between cloth soaked in vinegar and water

• Arrange your rust pieces on the cloth or paper. This gives you an illusion of control, but don't kid yourself – the best part of rust printing is that the results are always a surprise. Spray everything again with your vinegar mix.
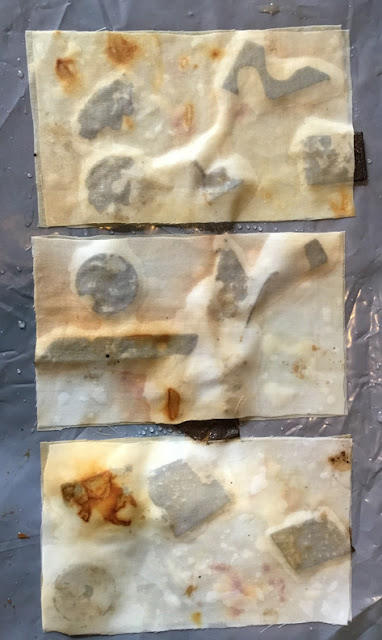
Rust doing its magic

• Put down a top protective layer of plastic, and weight the whole thing down with stacks of books (you are going for maximum contact between the irregularly shaped rust and the material being dyed). It has occurred to me that the ideal way to weight things down would be malleable bags of sand, but I haven't tried that yet.

• At the end of the process, simply wash your dyed cloth thoroughly in a basin of soap and water.

Rust-Dyeing Cloth


Here you can see the results of rust-dyeing the index-card-size strips of cloth shown above. Note that those process photos are showing a technique using a piece of cloth both below and on top of the rust pieces. It is a handy way to double your output, but for all other projects below I stuck with one layer and the protective sheet of plastic, which always goes on top no matter how many layers you have.

This project involves creating another of the pieces I have started calling "spirit cloths," for lack of a better explanation. Making them has become a compulsion.
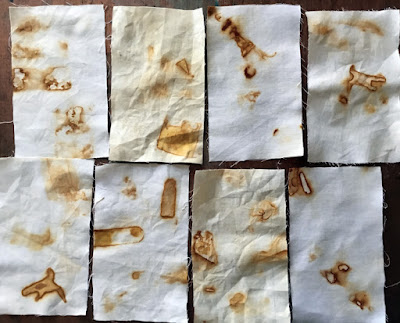
Freshly dyed cloth panels

Panels sashiko-stitched together to become spirit cloth

Paper


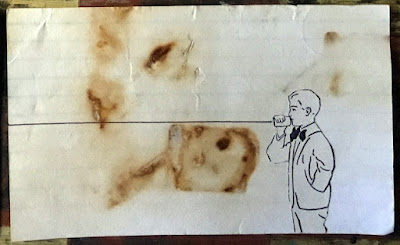
Since I was already using index cards as templates for cutting out pieces for the spirit cloth, I figured I may as well experiment with directly printing on the cards themselves. The results were so evocative that I turned to my archives of vintage books containing copyright free images to create a few vaguely cosmic collages.
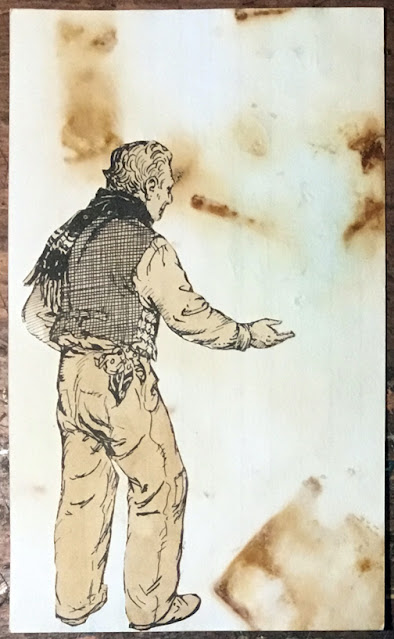
"Space cowboy"

"Playing with the matter of the universe"
(or: How were you picturing a higher power?)

"Galactic communication"

Rust-Dyed Clothing


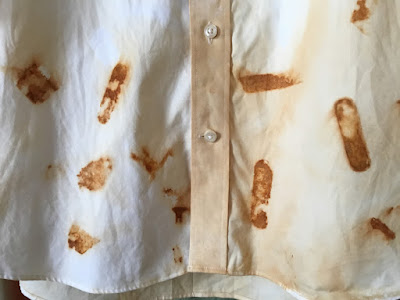
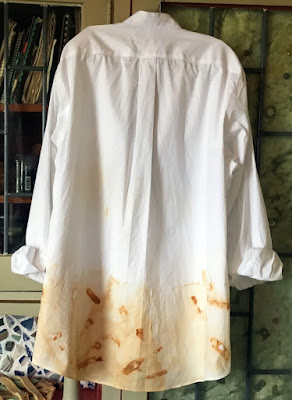
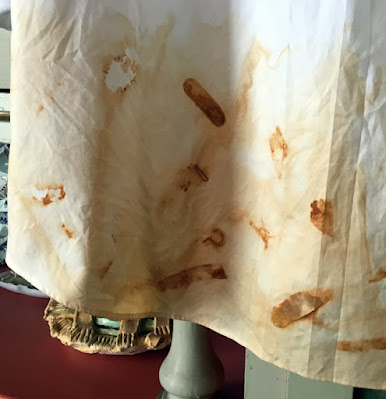
And finally (for now) we have rust-dyeing on up-cycled thrift store clothing. This is a standard man's business shirt, with the collar removed (carefully pick out original stitching, remove collar, restitch closed). The trick here was to do it in sections and to use weights to hold the shirt in place so the whole mess didn't go sliding off the table. I restricted the dyeing to the bottom edge of the shirt. That dye creeping up the front placket was an unexpected, but not unwelcome accident.
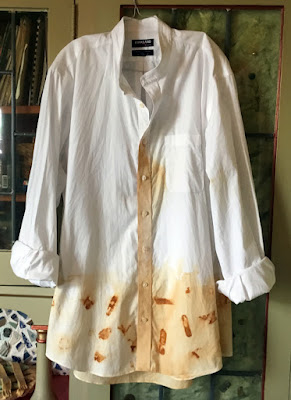
Shirt front

Shirt front detail

Shirt back

Shirt back detail

Hopefully this will inspire you to do some experimenting of your own, and to wander down gritty alleyways and old barns looking for rust. Your house will stink of vinegar, but who gives a damn?

Thursday, December 22, 2022

The Transcultural Traveling Scarf

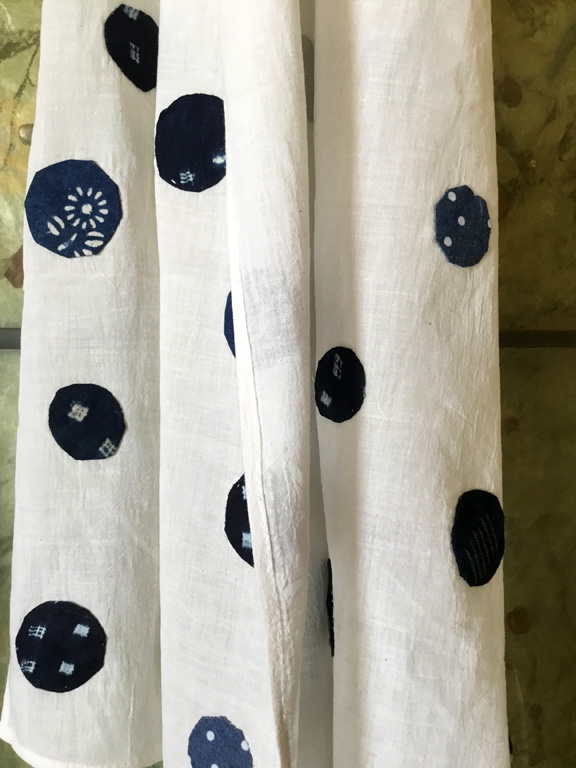
Does it get any better than floating polkadots?

This piece incorporates bits and pieces of textiles found, foraged and gifted over time. The base is part of a thin muslin sari from India. The polkadots are made from cloth scraps from West Africa, Guatemala, and both London and Oakland thrift finds.


The technique used to create polkadots involves making multiple circular shapes out of card stock. A scrap of fabric is then rough cut to extend about 1/2" beyond the card-stock template. The cloth is then ironed over the template to create a neat polkadot. The template is removed before stitching the polkadot down, and can be used again.

Creating polkadots

Ironing down the edges


Finished polkadot backside


The polkadots were attached by pick-stitching around each edge, working from the back of the scarf.

"Invisible" pick-stitching from back

As this is being written, the scarf is winging its way to London  - and from there to who knows where.


Ready to hit the road

Related Posts with Thumbnails